Otanu of Eos: 2 – Journey to Lavinia

A continuation of my previous mini-campaign about Heliana the Priestess. I am using Ironsworn, Four Against Darkness (mostly for dungeon crawls), PocketLands 1.1 and Scarlet Heroes for hex-crawling and further inspiration. I have created a D100 hex-based version of the PocketLands Discovery Table: D100Lands.

Previously: Otanu is the son of Avella, queen of the island of Eos. The priestess Heliana has forced Avella to return to the True Cult, which she had abandoned to follow the wizard Althus. Otanu refuses to join the True Cult and sails to the East with a few trusted companions, hoping that one day he will bring back to Eos the cult of the Old Gods. Otanu is a devotee of the war goddess Torgana; when he lands across the sea in the small village of Asona, he swears to offer 1000 gold pieces to the Great Temple of Torgana to get guidance from the Goddess. Together with his three companions, he delves into a dungeon and collects the first gold for the offering.

All episodes.

_____

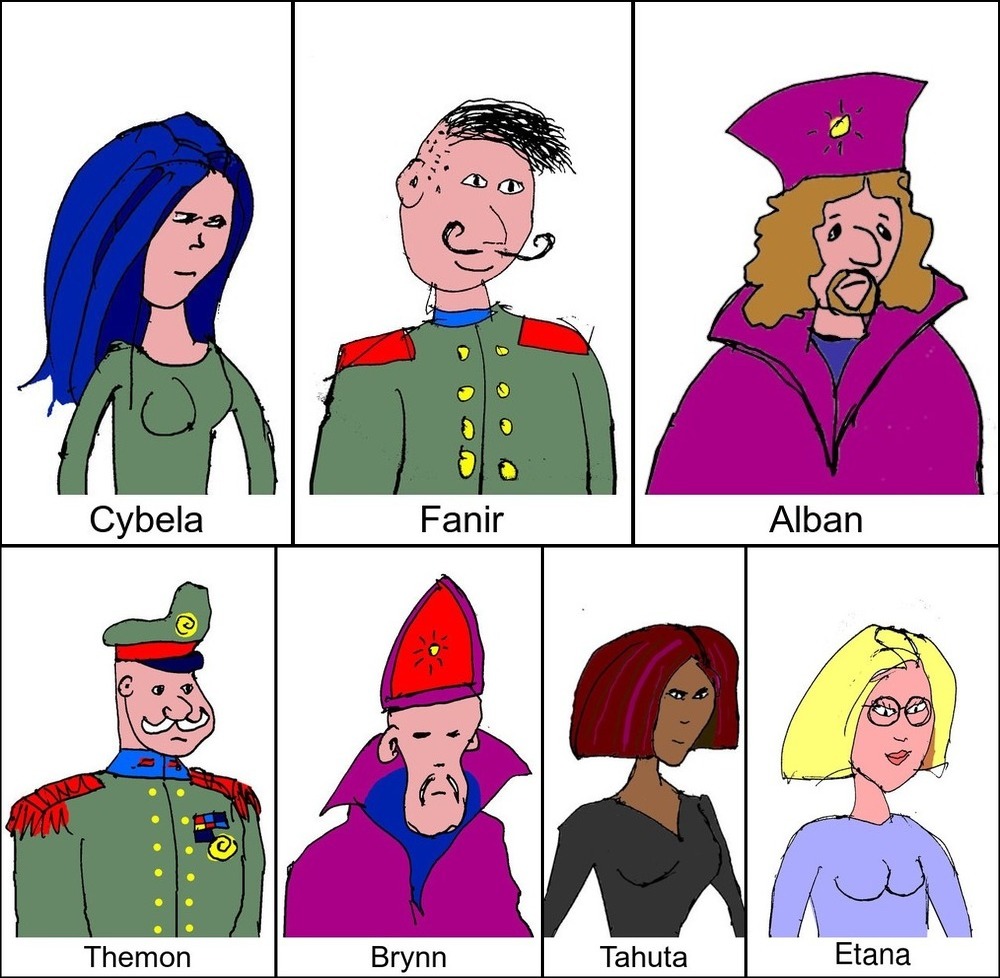
Main character: Otanu, prince of Eos

Edge:2; Heart:3; Iron:4; Shadow:2; Wits:3. (4AD Level 2)

Assets:
• Companion : “Kindred” (Arakna the Wizard, 4AD Level 2) – Your friend stands by you. Skilled: When you make a move outside of combat (not a progress move) aided by your companion’s expertise, add +1.
• Path: “Herbalist” – When you attempt to Heal using herbal remedies, and you have at least +1 supply, you may choose one (decide before rolling). * Add +2. * On a hit, take or give an additional +1 health
• Combat Talent “Thunder-Bringer” – If you wield a mighty hammer… When you Face Danger, Secure an Advantage, or Compel by hitting or breaking an inanimate object, add +1 and take +1 momentum on a hit.

Heath:2; Spirit:5; Supply:5; Momentum:4. Gold pieces: 131.

Arakna’s Health: 2/4

Background Vow (Extreme): rise an army to conquer the Island of Eos and bring back the Old Gods (Progress: 0).

Dangerous Vow: Offer 1000 gold pieces to the Great Temple of Torgana to get guidance from the Goddess (Progress: 2).

Four Against Darkness party members:
Otanu (4AD Cleric Level 2).
Arakna (4AD Wizard Level 3).
Deshin the Dwarf (4AD Level 1).
Willa the Warrior (4AD Level 1).

_____

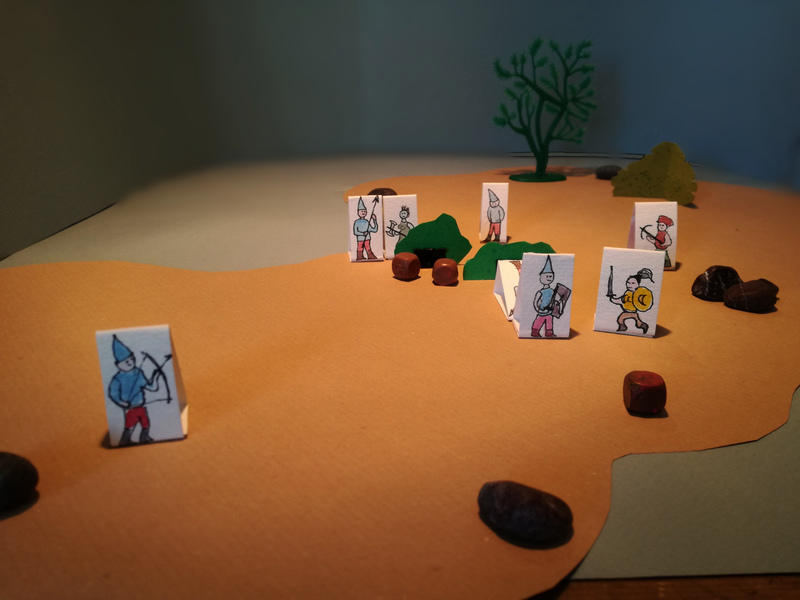
All the members of the team were badly wounded fighting monsters in the dungeon. They take their time recovering in Asona.

Sojourn: Challenge:2,6; Action:2+3Heart; WEAK HIT.

They partially recover: still -1 Health (Otanu:4, Arakna:3) and -1 Life for 4AD.

Otanu asks the villagers about the location of the Great Temple of Torgana.

Gather Information: Challenge:4,10; Action:4+3Wits; WEAK HIT.
(+1 momentum, now 5).
He gets vague indications that the temple is far, somewhere to the North-East. The best route is first reaching a larger town to the East: Lavinia. The party leaves Asona for this Dangerous Journey.

(In the following, I also use the two Journey Challenge dice as a 100 to select an hex from D100Lands. I apply terrain modifiers to the Action die: +1 when on a road; -1 if crossing a river without a bridge / road or terrain other than Grassland or Hills).

Journey: Challenge: 2,4; Action: 4+3Wits+(1 road). STRONG HIT.
Hex 24, Mountains, with road continuing to the East and a new river.
Waypoint: the party reach a bridge across a river in a narrow mountain valley.
Journey progress: now 2.
(I like the idea of Asona being surrounded by mountains, and I add two more Mountain hexes to the North of the current hex).

Journey: Challenge: 9,1 ; Action: 4+3Wits(+1 road, -1 mountains). WEAK HIT.
(-1 supply, now 4).
Hex 91, Hills, road continuing South-East.
They leave the mountains behind and cross gentler hills. A second bridge (waypoint) takes them again across the river. Otanu decides to follow the road, though it is turning South-East.
Journey progress: now 4.

Journey: Challenge: 3,9; Action: 3+3Wits(+1 road). WEAK HIT.
(-1 supply, now 3).
Hex 39, Grassland, road to the South-West.
Waypoint (Ironsworn oracle): Peaceful Hill.
Journey progress: now 6.
The road takes them to a solitary green hill in the plain, then turns South and West. This looks like a perfect place to Make Camp and try to fully recover from their wounds.
Make Camp: Challenge: 8,7; Action: 4+3Supply. MISS.
(-1 Supply, now 2). At night there is a sudden storm. They cannot rest and some of their supplies are lost.

Again, I add an arbitrary hexagon: more hills, with the river flowing through them towards the sea.

Journey: Challenge: 8,2 ; Action: 2+3Wits. WEAK HIT.
(-1 Supply, now 1).
Hexagon 82, Grasslands.
Journey progress: now 8.

Otanu decides it is better to try and gather some food.
Resupply: Challenge: 1,7; Action:3+3Wits. WEAK HIT.
(+2 supply, now 3; -2 momentum, now 3).
It takes them more time then expected, but they can hunt something and gather some edible roots.

Journey: Challenge: 6,8; Action: 4+3Wits. WEAK HIT.
Journey progress: 10.
Reach your destination: Challenge: 6,10 vs 10. WEAK HIT.
They reach Lavinia. I mark progress on the “offering to the Great Temple” vow (now 2).
Hex 68: Grassland.
I add to the map the town of Lavinia and a road that follows the directions on Hex 68 (but I would have added an arbitrary road anyway, if it were not on the PocketLands hex).

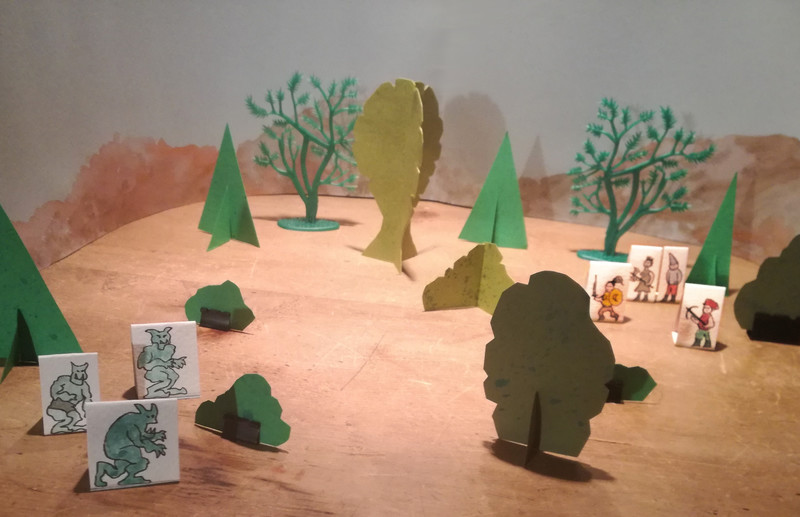
The Weak Hit requires a complication (an opportunity for a 4AD Dungeon-crawl): Darvus Jr, the son of Duke Darvus, has been kidnapped by rebels. It is believed that they are hiding in the necropolis West of Lavinia. A huge man-hunt is taking place, and all the people capable to fight are ordered to help.

I roll for the hex West of Lavinia: 47, Hills, and I mark the Necropolis.

From Asona to Lavinia.

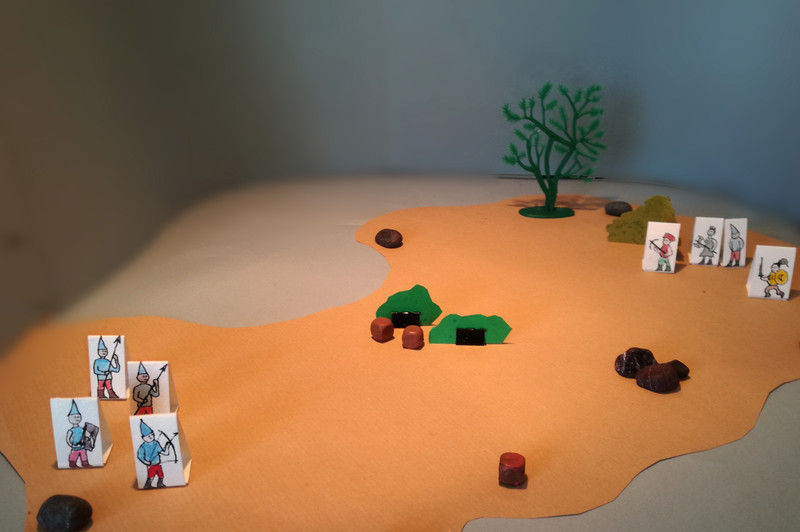
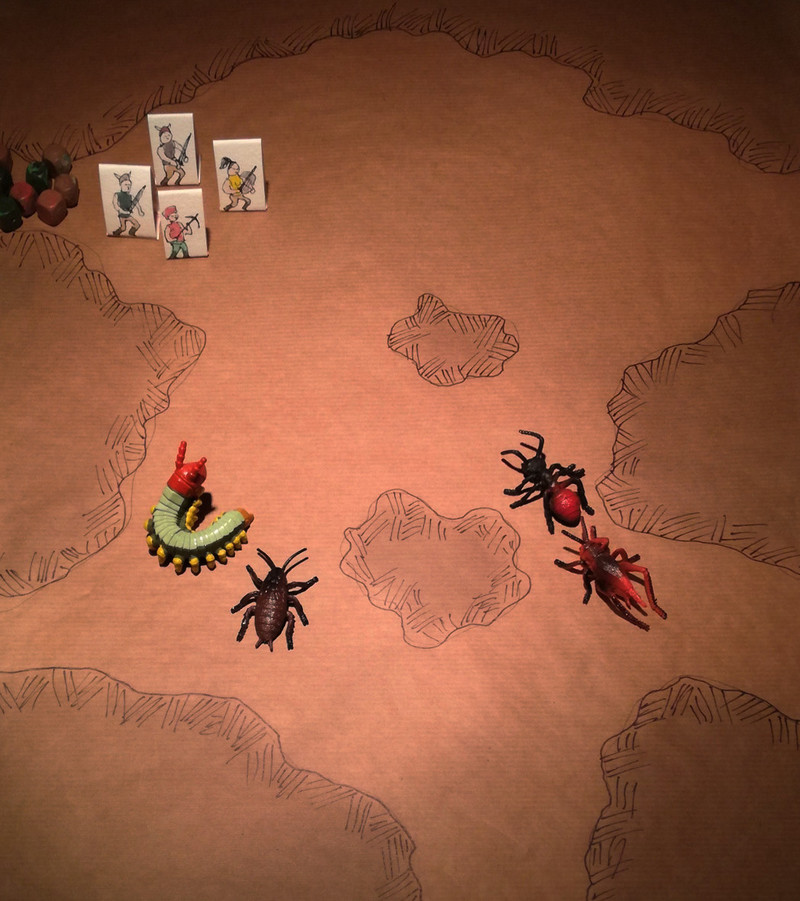
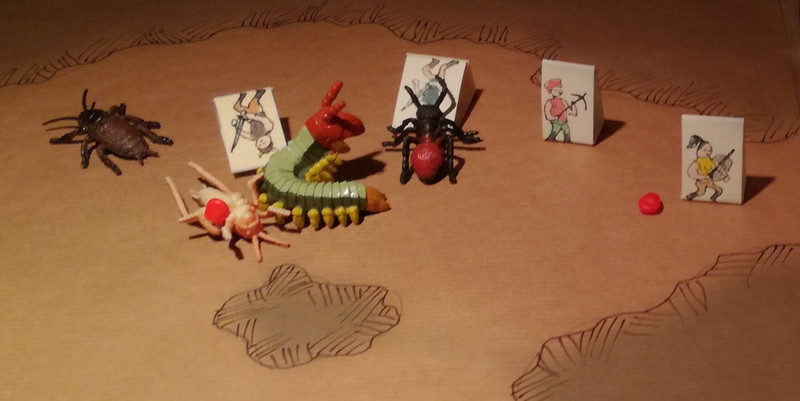
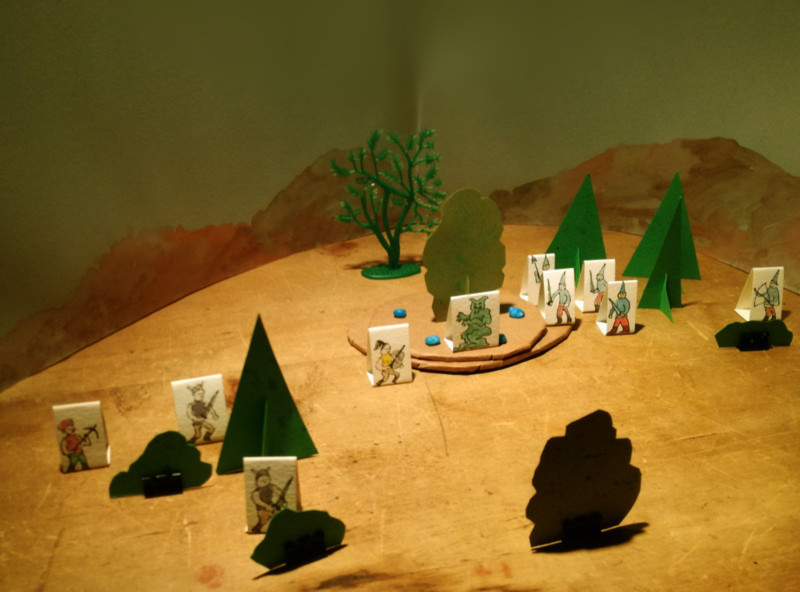
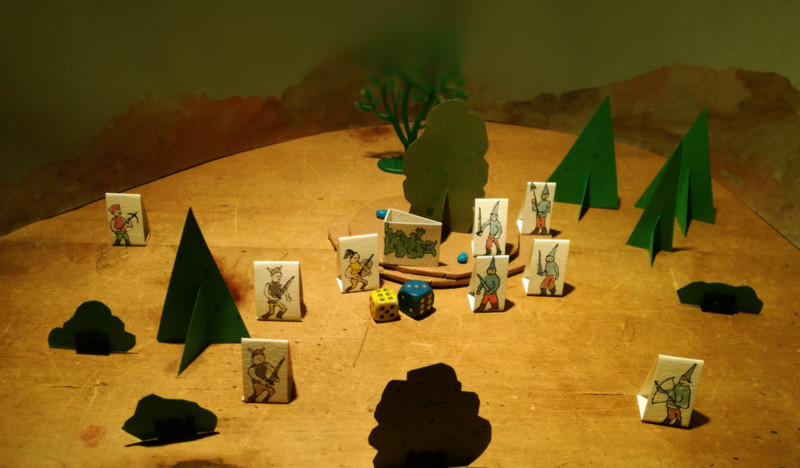
4AD Mission: after 7 encounters won against monsters, the party will fight d6+2 Lev4 Rebels, with a chance of finding Darvus Jr.

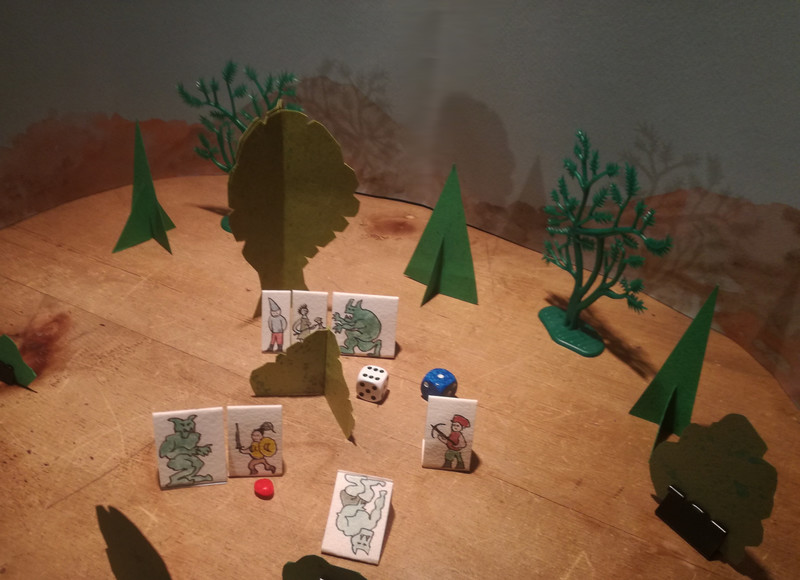
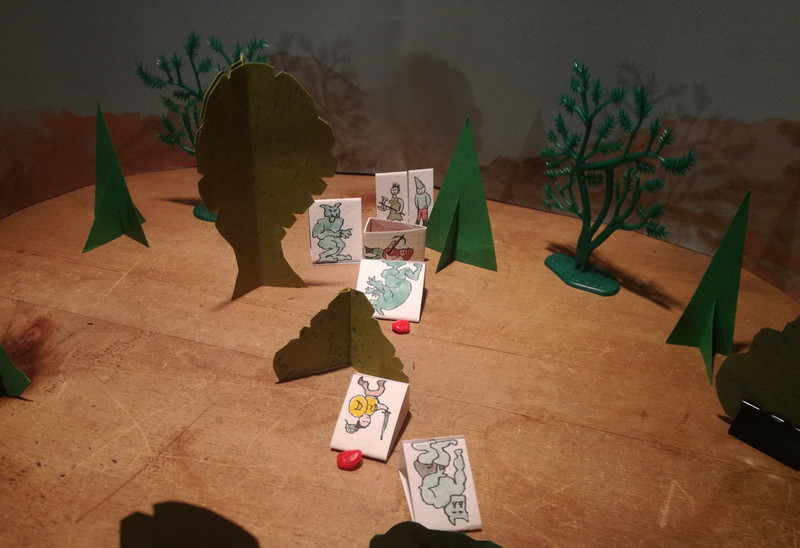
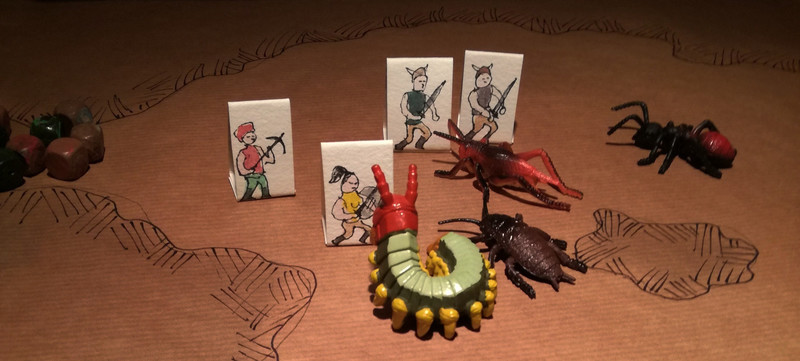
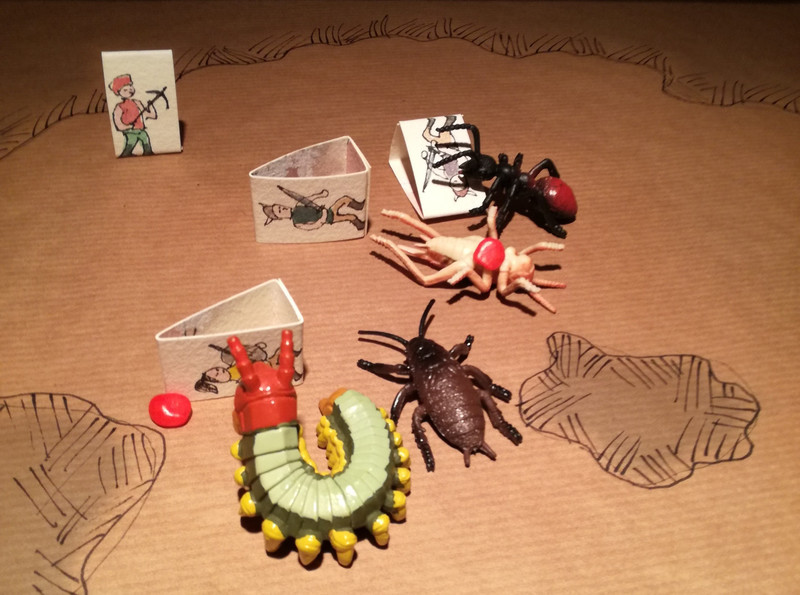
The party explores several rooms in the underground necropolis. They finally find and defeat a group of 3 rebels. They collect more gold (new total: 260 gp).
Do they find Darvus Jr? (Unlikely) NO.
Do they find any valuable hint? 50/50 NO.

They are even more wounded now (Otanu’s Health:3; Arakna’s:2).
They capture one of the rebels and deliver him to the duke’s guards.

Into the necropolis, in search of Darvus Junior.

_____

Current Situation:

Heath:3; Spirit:5; Supply:2; Momentum:3. Gold pieces: 260.

Arakna’s Health: 2/4

Background Vow (Extreme): rise an army to conquer the Island of Eos and bring back the Old Gods (Progress: 0).

Dangerous Vow: Offer 1000 gold pieces to the Great Temple of Torgana to get guidance from the Goddess (Progress: 2).

Four Against Darkness party members:
Otanu (4AD Cleric Level 2).
Arakna (4AD Wizard Level 3).
Deshin the Dwarf (4AD Level 1).
Willa the Fighter (4AD Level 1).

Cybela and the Monsters of Grayhill – Season 2 Episode 1

A solo campaign with plastic toys based on the Ironsworn RPG. In Season 2, I will fight battles using the Mighty Monsters miniature rules by Ganesha Games.

Previous Events. Season1: Duchess Cybela of Elfbrook is a mecha pilot. Together with her friend Tahuta (a secret agent) and Count Fanir (a mecha pilot and adept of the Cult), Cybela takes part in the fight against the Boarwood invaders. The enemy is defeated and the Iron Talisman they had stolen is recovered.

As a starting point for Season 2, I rolled a Major Plot Twist:
Someone or something goes missing.

Is this the Iron Talisman again (unlikely): YES

I also rolled a new NPC: Religous Guard

The Iron Talisman was kept in the treasure chamber of the Elfbrook cathedral. When it goes missing, also the Cult treasurer Provost Alban of Grayhill disappears. A few days later, the city of Grayhill is attacked by huge monsters of unknown origin. The Elfbrook mecha division is sent to Grayhill.

Swear an Iron Vow: Free Grayhill from the Monsters (Dangerous)
Challenge:6,7
Action:6+1Heart+1(Bond with the Duchy)=8 Strong Hit +2 Momentum

Cybela is sure that this has been a misstep by the cult. It is a great opportunity to advance in her long-term goal of reducing the power of the Cult in favour of the authority of her father, Duke Themon.

all

NPCs:

  • Count Fanir – Cybela’s rival as the best mecha-pilot in Elfbrook and a fervent adept of the Cult.
  • Provost Alban of Grayhill: former treasurer of the Cult, who disappeared together with the Iron Talisman
  • Duke Themon of Elfbrook – Cybela’s father
  • Archmage Brynn, uncle of Cybela and leader of the Cult. A powerful and ambiguous man.
  • Tahuta – an agent in Elfbrook special forces and Cybela’s best friend.
  • Etana – chief engineer at the Mechanization Ministry. She favours AI robots over human-controlled mecha.

Scenario Oracle: Blood Journey

Cybela and Fanir are charged to escort a medical team bound to a military hospital in Grayhill. They are confronted by a Winged Golem and a Triceratops.

monster
Left to Right: Cybela and Fanir’s mechas; the medical team; Golem and Triceratops

Mighty Monsters stats:

Cybela’s Mecha (180 pts)
Head:Q4C2 Laser-Shoot Medium C2; Body:Q4C4; Arms:Q4C3 Laser-Shoot Long C3; Legs:Q4C2

Fanir’s Mecha (145 pts)
Head:Q4C2 Laser-Shoot Medium C2; Body:Q4C3; Arms:Q4C3; Legs:Q4C2

Medics: Q4 C1 Short Move

Winged Golem (210 pts)
Head:Q4C2 Area-Attack Medium C2; Body:Q4C3; Wings:Q4C2 Fly Medium; Legs:Q4C2; Tail:Q4C3

Triceratops (120 pts):
Head:Q4C3 (Head Butt); Body:Q4C3; Legs:Q4C2; Tail:Q4C2

dav

Turn 1,2: The Golems Area Attack hits Cybela’s mecha (1 hit) and the medical team (1 man down). Fanir hist hard the triceratops (2 hits and Groggy).

Turn 3,4: A second Area Attack takes down a second member of the medical team: only one survives. Cybela hits the Golem (1 hit).

IMG_20190727_175941

Turn 5,6: The Golem flies on the top of a building, but Cybela’s laser attacks knock it down.

Turn 7: the surviving man advances. The Golem stands up only to be knocked down again by Cybela. Fanir and the Triceratops confront each other, but with no effect.

Turn 8,9: the man is now only one move away from exiting the board. Cybela hits the Golem again: it now has taken 5 hits (1 yellow die and 2 red).

dav
The golem is knocked down

Turn 10: after several failed attempts, the Triceratops charges Fanir’s mecha and hits.

Turn 11: The Golem stands up and hits both mechas. The Triceratops knocks down Fanir’s Mecha.


Turn 12: the man successfully exits the board! Cybela’s mecha is crippled by the Golem. The Triceratops hits again Fanir’s mecha: the result should have been a Knock Down, but since the macha already is on the ground, it is destroyed!

IMG_20190727_184344

The Elfbrook team has partially achieved its goal, but they were the first side to loose a unit in the fight. I will grant a single advance on the Dangerous vow progress track and Elfbrook must pay the price: someone suspects that Fanir deliberately let his mecha be destroyed.

Is Fanir suspected by Etana (likely) or by Cybela herself (unlikely)? Cybela.

Cybela’s current situation:

Stats: Edge:2 Heart:1 Iron:2 Shadow:1 Wits:3
Health:5 Spirit:5 Supply:5 Momentum:3
Vow: free Grayhill from the Monsters (Dungerous) – Progress:1
Background Vow: limit the power of the Cult (Extreme) Progress:0.8

Mighty Monsters by Ganesha Games: demolition golems

For my second Mighty Monsters game, I set up a more complex scenario: two golems (entering from the left) will try to destroy as many as possible of the six coloured buildings. Two robots and 4 infantry stands will try to stop them. Both the golems and the robots have a stronger and a weaker unit. The stronger golem can flight and has a psychic ranged area-attack; the rock golem is slow and has no ranged attack. The advanced robot is armed with two lasers; the regular robot has a single laser.

Winged Golem (303 pts)
Head Q3 C2 AA2L; Body Q3 C3; Arms Q3 C3; Wings Q3 C2 Fly Long; Legs Q3 C2; Tail Q3 C3

Rock Golem (175 pts)
Head Q3 C2; Body Q3 C3 Charge; Arms Q3 C4; Legs Q3 C2 Slow

vs

Advanced Robot (230 pts)
Head Q3 C2 Laser C2M; Body Q3 C4; Arms Q3 C3 Laser C3L; Legs Q3 C2

Regular Robot (175 pts)
Head Q3 C2 Laser C2M; Body Q3 C2; Arms Q3 C3; Legs Q3 C2

Infantry (12 pts x 4) Q3 C1

00labels

The two golems, entering from the right side of the board, move towards the closest buildings. The Advanced Robot is fast at taking a good shot at the Winged Golem and inflicts the first hits. The Winged Golem ignores the wounds and destroys Building #2; at the same time, the slow rock golem brings down Building #1.

dav
First two buildings destroyed

The Winged Golem flies on the opposite side of the board, taking cover behind Building #3. The Advanced Robot rushes in pursuit. While the Regular Robot hesitates at the centre of the board, the Rock Golem slowly moves towards Building #4.

03

The Winged Golem easily destroys Building #3. He then throws a devastating psychic attack towards the Advanced Robot and the Army Men: 3 of the four Infantry units are killed. Then he flies to Building #5. The Rock Golem charges Building #4 and brings it down too!

05
Only the two buildings on the left still stand

The Winged Golem destroys Building #5. Then it flies back to the right side of the board and engages in a ranged fight against the Advanced Robot. The other robot tries to defend Building #6, the next target of the Rock Golem. But the golem charges and Knocks Back the Robot against the Building that collapses: the robot takes considerable damage too.

07
The Rock Golem slams a robot into the last building

With all the buildings destroyed, this was a clear victory for the golems. I played some more rounds. The Rock Golem killed the last Infantry unit, but all the main figures kept fighting, even if some were starting to accumulate red dice.


Now that I begin using different attacks (Slam, in particular) things are more fun. Also, having specific objectives (the buildings in this case) always makes games more interesting. It is clear that a game as large as this (about 500 points per side) is going to take a couple of hours. For my next games, I will try to stay closer to 400 points, and I will make buildings C3 (instead of C2) so that it is less easy to destroy them. I am looking forward to receive the Adventure Crafter by Tana Pigeon, so that I can add some role-playing and link the fights into a story.

Mighty Monsters by Ganesha Games: a solo fight

I ran a first Solo game with the Mighty Monsters rule-set by Ganesha Games. The game is a little more complex than I expected, so I left out some bits. In order to simplify book-keeping, I slightly modified how the “degradation” of wounded units work: a unit gains a single token for each of Slowed, Groggy and Crippled, in this order. These conditions are represented by the pink cubes. The yellow / red pebbles represent yellow / red dice (how dangerous it is to attempt actions). Totally unharmed units have no tokens (no pebbles nor dice).

Blue units (deployed on the left):

3 Infantry squads (each represented by two figures) Q3 C1 Puny Short-Move

A mighty Robot
Head Q3 C3 Shooter C2L (laser)
Body Q3 C4
Arms Q3 C3 Shooter C2L (laser)
Legs Q3 C3 Short-Move

Red side (on the right)

A mighty winged golem
Head Q3 C3 Area Attack C3M (psychic)
Body Q3 C4
Arms Q3 C4
Wings Q3 C4 (Long Flight)
Legs Q3 C3
Tail Q3 C3

00

The golem crosses the whole board in a single flight and takes position in cover at the corner of a building. His psychic attack hits both the Robot and the soldiers: the Robot now has a yellow die and two of the three infantry squads are out of combat.

01
The robot rushes forward and gains a clear line of sight to the golem. His lasers also hit, and the golem takes a yellow die in its turn. The golem flies on the top of the building and fires a second psychic area-attack: the last infantry squad is out and the Robot takes a second yellow die. The robot immediately retaliates.

dav

The golem flies back to the right side of the board. The robot follows, shooting with both lasers and hits again.

04

After a few more exchanges of ranged attacks, both units have three yellow dice. The golem is Slowed, Groggy and Crippled (the psychic attack is no more available). The robot is only Slowed.
The two close in for the final hand-to-hand fight. It lasted several turns and in the end the robot prevailed.

05

I like the game and I hope to play more in the near future. By its nature, it allows to use any random figure, more or less independently on scale. The rules detail a number of different attacks, which should provide for a nicely narrative. Damage is handled in such a way that attacks get less and less effective, while defence is unaffected. I guess this could result in somehow slow end-games. But I must try the Berserk rule (one of the things I ignored in this first game): it allows each non-Robot figure to perform a lethal attack which I think might often end a battle. Another thing I could experiment with is lowering the C score of Bodies (which is basically irrelevant for attacks and essential to defensive rolls).

Amara of Whitebridge 11 – A trollish setback

Amara is travelling South with Delos, the Broken Kodra and her Makari prisoner Alith. The party has a disastrous encounter with three nasty trolls.

[An Ironsworn adventure in the Ironlands. I play skirmishes with the Song of Blades and Heroes rule-set by Ganesha Games. Larger battles are played with the Ancient One Hour Wargames rules by Neil Thomas]

Previous events: Amara of Whitebridge, her cousin Quinn and the crossbowman Delos attack a group of Broken near the village. Amara is defeated. The overseer Lestara harshly critiques Amara’s initiative, which ended in favouring Lestara’s rival Zura. The heroes leave Whitebridge and reach Stoneford, where they meet the healer’s son Kaivan. Stoneford is occupied by the Makari, a mysterious invading army. The party joins a successful counter attack against the Makari: the leader is the friendly Lago of Redhall – it’s love at first sight with Amara. The heroes return to Whitebridge and free Lestara from the Makari. Lago and Quinn fall in the fight. Amara reaches Redhall where the overseer Maya, mother of Lago and Lona, asks her to travel south in search of the twin sorceresses Varena and Purena: they are authorities among the Broken and their help is necessary to re-conquer Whitebridge. Two Whitebridge warriors who were travelling with Amara and Delos are killed by monsters. Amara and Delos help a Broken girl, Kodra, who is leading the Makari prisoner Alith to her community: Kodra and Amara forge a bond and Kodra accepts to travel with Amara and Delos.

Main character: Amara
Edge:+1 Heart:+3 Iron:+2 Shadow:+2 Wits:+1
Health:3 Spirit:4 Supply:2 Momentum:4

Place Whitebrige – a riverside village
NW Haven (near the center of the Ironlands)

ASSETS:
Martial Focus – BRAWLER Secure an Advantage by engaging in close-quarters brawling.
Ritual – AUGUR Summon a murder of crows and ask a single question.
Path – HERBALIST Heal people using herbal remedies.

BONDS:
Deshi (Amara’s father) [oracle: stingy and manipulative forager]
Lestara (Whitebridge overseer) [oracle: generous and powerful healer]
Quinn (Amara’s cousin) strong and dumb warrior
Lago – an attractive and friendly warrior from Redhall
Maya – Redhall overseer
Kodra – a Broken girl

Other NPCs:
Zura – a warrior from Whitebridge who wants to replace Lestara as overseer
Kaivan – the son of the Stoneford healer
Lona – Lago’s sister, another Redhall prominent warrior
Varena and Purena – twin sorceresses
Temir and Flint – Redhall allies killed by Harrow Beasts
Alith – Kodra’s Makari prisoner

VOWS
Background Vow: – Extreme. When Amara’s father Deshi was overseer, he started a feud with the nearby Stoneford community (another village on the same river, twenty miles NE of Whitebridge). Amara intends to mend the conflict started by her father. Progress: 0.5
Dangerous Vow (reconquer Whitebridge) Progress:2
Dangerous Vow. Let Lestara be overseer for the next seven years. Progress:4
Formidable Journey to find Varena and Purena: Progress 5

Undertake a Journey – Challenge:1,9 Action:6+1(Wits)+1(Kodra)=8 WEAK HIT
Amara and the others proceed South, they finally exit the marshes, but supplies are always short (-1, now 1). Journey progress: 6.

Location Oracle: Peaceful Steading
They reach a large Steading belonging to a young woman, Saura, and her siblings.
Is Saura hostile towards the Broken? [50/50] NO
Saura has a deal with the Borken: she gives them some of her crops and they protect the area around the steading. Still, the surroundings are dangerous.

Sojourn – Challenge:4,2 Action:6+3(Heart)=9 STRONG HIT
Amara Recuperates completely from the wounds received during the previous fights (+2 Heath=5). Saura also provides generous food for the next days of travel (+2 Supplies=3).

Journey – Challenge:7,7 Action:4+1(Wits)+1(Kodra)=6 MISS
I interpret the Matches as someone trying to rescue or eliminate the Makari prisoner Alith: he will be the main target of the aggressors.
Are the attackers humans or trolls? [50/50] Trolls

While following a “lush trail” South, the party is faced by three large trolls.
a1.jpg

Amara attacks one of the trolls, but it’s a hard fight and soon she is wounded. Delos manages to put one of the attackers out of combat.
The largest troll attacks Kodra: she fights bravely and with this blow she manages to make the attacker momentarily fall.
c3.jpg

Delos and Kodra join forces and defeat the troll leader, but Amara is now out of combat.
Does the last troll retreat? [50/50] NO
He attacks Delos and puts him out of combat.
d4.jpg

I stop the fight here, since the two main characters are unconscious.

When Amara regains her senses, does she see Kodra around? [50/50] NO
Is Alith the Makari there? [small chance] NO

What happened of Delos?
Companion Endure Harm – Challenge:9,9 Action:6+3(Heart)=9 MISS

The matches seem to me to require a “strong” interpretation of the miss: Amara finds the lifeless body of Delos (-2 momentum, now=2)

Amara has received 2 harms (Health now at 3).
Endure Harm – Challenge:1,8 Action:1+2(Iron)=3 Weak Hit

The death of Delos is a blow for Amara: it was the last of his Whitebridge companions. Also, Kodra was familiar with the region and she might have helped Amara interact with the Broken, when she reaches her destination. Yet she will have to go on by herself.

Current situation:
Health:3 Spirit:4 Supply:3 Momentum:2
Extreme Background Vow: (alliance with Stoneford) Progress:0.5
Dangerous Vow (have Lestara oversee for the next years) Progress:4
Dangerous Vow (reconquer Whitebridge) Progress:2
Formidable Journey to find Varena and Purena: Progress 6

Amara of Whitebridge 10 – Kodra the Broken

Amara is travelling South with Delos in search of the twin sorceresses Varena and Purena. They meet Kodra, a Broken who is escorting a Makari prisoner, and help her fight a Makari patrol.

Previous events: Amara of Whitebridge, Quinn and the crossbowman Delos attack a group of Broken near the village. Amara is defeated. The overseer Lestara harshly critiques Amara’s initiative, which ended in favouring Lestara’s rival Zura. The heroes leave Whitebridge and reach Stoneford, where they meet the healer’s son Kaivan. Stoneford is occupied by the Makari, a mysterious invading army. The party joins a successful counter attack against the Makari: the leader is the friendly Lago of Redhall – it’s love at first sight with Amara. The heroes free Lestara, who had been imprisoned by the Makari in Whitebridge. Lago and Quinn fall in the fight. Amara reaches Redhall where the overseer Maya, mother of Lago and Lona, asks her to travel south in search of the twin sorceresses Varena and Purena: they are authorities among the Broken and their help is necessary to re-conquer Whitebridge.Two Whitebridge warriors who were travelling with Amara and Delos are killed by monsters, Amara is wounded.

Main character: Amara
Edge:+1 Heart:+3 Iron:+2 Shadow:+2 Wits:+1
Health:1 Spirit:4 Supply:2 Momentum:1

Place Whitebrige – a riverside village
NW Haven (near the center of the Ironlands)

ASSETS:
Martial Focus – BRAWLER Secure an Advantage by engaging in close-quarters brawling.
Ritual – AUGUR Summon a murder of crows and ask a single question.
Path – HERBALIST Heal people using herbal remedies.

BONDS:
Deshi (Amara’s father) [oracle: stingy and manipulative forager]
Lestara (Whitebridge overseer) [oracle: generous and powerful healer]
Quinn (Amara’s cousin) strong and dumb warrior
Lago – an attractive and friendly warrior from Redhall
Maya – Redhall overseer

Other NPCs:
Zura – a warrior from Whitebridge who wants to replace Lestara as overseer
Kaivan – the son of the Stoneford healer
Lona – Lago’s sister, another Redhall prominent warrior
Varena and Purena – twin sorceresses
Temir and Flint – Redhall allies killed by Harrow Beasts

VOWS
Background Vow: – Extreme. When Amara’s father Deshi was overseer, he started a feud with the nearby Stoneford community (another village on the same river, twenty miles NE of Whitebridge). Amara intends to mend the conflict started by her father. Progress: 0.5
Dangerous Vow. Let Lestara be overseer for the next seven years. Progress:4
Dangerous Vow (reconquer Whitebridge) Progress:0
Formidable Journey to find Varena and Purena: Progress 5


Amara applies her Herbalist skill to Heal herself:
Challenge:2,2 Action:1+1(Wits)+2(Herbalist)=4 STRONG HIT
+2 Health (now 3)

Oracle suggestion for the matching dice: Escort Problem – Amara and Delos meet a Broken girl, Kodra, who is escorting a Makari prisoner. She tells them that the Makari (named Alith) has sworn an Iron Vow to help the Broken, but he will only speak in front of the council of the elders. All Kodra’s companions have been killed in a fight with Makari-led trolls.

Amara and Delos tell Kodra how they have been fighting the Makari in Stoneford and Whitebridge. Amara asks Kodra to travel together.
Compel – Challenge:2,1 Action:1+3(Heart)=4 STRONG HIT
Kodra gladly agrees. For the rest of the Journey, Kodra will provide a +1 on Journey rolls (she is familiar with the area).

Undertake a Journey – Challenge:5,7 Action:2+1(wits)+1(Kodra)=4 MISS

They have only travelled a couple of miles, still in the marshes, when they meet a Makari patrol!
a1

Amara and Kodra attack the two Makari armed with spears. Amara quickly defeats her opponent and is then assaulted by the Makari leader. Delos stays at the rear shooting his bolts.
c3

Kodra is put out of combat, but Delos kills the Makari archer and Amara the leader. Delos and Amara jointly attack the last Makari, who was approaching the prisoner, and easily prevail.
d4

Is Kodra still alive? [Likely] YES

Amara applies again her Herbalist skill.
Heal – Challenge:4,3 Action:3+1(Wits)+2(Herbalist)=6 STRONG HIT
The Broken was only lightly injured and Amara’s herbs put her on her feet in only a few minutes.
This seems like a good time to
Forge a Bond with Kodra – Challenge:7,4 A:6+3(Heart)=9 STRONG HIT (+2 Momentum – Now 4)

I grant Amara some progress on the Dangerous vow to reconquer Whitebridge – the first step in an alliance with the Broken has been taken!

Current situation:
Health:3 Spirit:4 Supply:2 Momentum:4
Extreme Background Vow: (alliance with Stoneford) Progress:0.5
Dangerous Vow (reconquer Whitebridge) Progress:2
Dangerous Vow (have Lestara oversee for the next years) Progress:4
Formidable Journey to find Varena and Purena: Progress 5

Amara of Whitebridge 9 – The Cave of the Harrow Beasts

Amara and her allies are travelling South in search of the twin sorceresses Varena and Purena. Heavy rains induce them to enter a cave in the hills and they are attacked by a number of harrow beasts.

[An Ironsworn adventure in the Ironlands. I play skirmishes with the Song of Blades and Heroes rule-set by Ganesha Games. Larger battles are played with the Ancient One Hour Wargames rules by Neil Thomas]

Previous events: Amara of Whitebridge, Quinn and the crossbowman Delos attack a group of Broken near the village. Amara is defeated. The overseer Lestara harshly critiques Amara’s initiative, which ended in favouring Lestara’s rival Zura. The heroes leave Whitebridge and reach Stoneford, where they meet the healer’s son Kaivan. The Stoneford river-idol is stolen by the Makari, a mysterious invading army, as a diversion to help in the occupation of Stoneford. Kaivan leaves the party, blaming Amara for the deception. The others join a successful counter attack against the Makari: the leader is the friendly Lago of Redhall – it’s love at first sight with Amara. The heroes free Lestara, who had been imprisoned by the Makari in Whitebridge. Lago and Quinn fall in the fight. Amara reaches Redhall where the overseer Maya, mother of Lago and Lona, asks her to travel south in search of the twin sorceresses Varena and Purena: they are authorities among the Broken and their help is necessary to re-conquer Whitebridge.

Main character: Amara
Edge:+1 Heart:+3 Iron:+2 Shadow:+2 Wits:+1
Health:3 Spirit:4 Supply:3 Momentum:9
Place Whitebrige – a riverside village
NW Haven (near the center of the Ironlands)
ASSETS:
Martial Focus – BRAWLER Secure an Advantage by engaging in close-quarters brawling.
Ritual – AUGUR Summon a murder of crows and ask a single question.
Path – HERBALIST Heal people using herbal remedies.
BONDS:
Deshi (Amara’s father) [oracle: stingy and manipulative forager]
Lestara (Whitebridge overseer) [oracle: generous and powerful healer]
Quinn (Amara’s cousin) strong and dumb warrior
Lago – an attractive and friendly warrior from Redhall
Other NPCs:
Zura – a warrior from Whitebridge who wants to replace Lestara as overseer
Kaivan – the son of the Stoneford healer
Lona – Lago’s sister, another Redhall prominent warrior
Maya – Redhall overseer
Varena and Purena – twin sorceresses
VOWS
Extreme Background Vow: When Amara’s father Deshi was overseer, he started a feud with the nearby Stoneford community (another village on the same river, twenty miles NE of Whitebridge). Amara intends to mend the conflict started by her father. Progress: 0.5
Dangerous Vow: Let Lestara be overseer for the next seven years. Progress:4
Dangerous Vow: Reconquer Whitebridge from the Makari. Progress:0
Formidable Journey to find Varena and Purena: Progress 3


Amara, Delos and the two Redhall fighters Temir and Flint proceed along their south-bound journey.

Undertake a Journey – Challenge:7,3 Action:3+1(Wits)=4 Weak Hit
Progress in now 4, Supply:2

Undertake a Journey – Challenge:8,10 Action:1+1(Wits)=2 MISS
[Burn momentum (9) to make this a Weak Hit]
Progress:5 Supply:1

The party reaches a [Location Oracle] “low spring”: they are entering a marshy area.
They are low of supply: time for hunting.

Resupply – Challenge:4,2 Action:3+1=4 Weak Hit
+1 Supply (now 2) -1 Momentum (now 1)
The area is not favourable for hunting, nor for collecting vegetable food: more plants and animal are poisonous in the marshes.

Undertake a Journey – Challenge:5,10 Action:1+1(Wits)=2 MISS
[Location Oracle] “abandoned cave”
It is raining heavily, they climb a low hill raising between the marshes. They find a cave that apparently is occasionally used by nomadic Broken and enter it: it is the only shelter in sight. When they enter the cave, the soaked rock ceiling gives way, trapping them inside. They reach a large chamber: rays of light suggest that there are several other exits. But four Harrow Beasts (giant insects) advance to attack!

a1

Amara attacks the largest beast, a caterpillar-like creature. Delos stays in the rear-guard, ready to use his crossbow. Temir and Flint attack a grasshopper-like creature.

b2

The Redhall warriors kill a first creature, but they the attacked by other two. Temir is killed. Amara is wounded by the caterpillar. Delos’bolts keep the cockroach-like beast back.

c3

Amara disengages from the fight with the caterpillar and leads the group towards and exit on the opposite side of the chamber. Delos follow her, but poor Flint doesn’t make it.

d4

Amara has been wounded [2 Harms, I decide. Health=1]

Endure Harm: Challenge:3,5 Action:5+2(Iron)=7 Strong Hit [+1 Momentum, now 2]
Amara is still sure that they are on the right track.

Make Camp: Challenge:5,10 Action:2+2(Supply)=4 MISS
They search a place to rest, but they cannot find other hills emerging from the marshes. The rain is too heavy to see at any distance.
[-1 Momentum, now 1]

Current situation:
Health:1 Spirit:4 Supply:2 Momentum:1
Extreme Background Vow: (alliance with Stoneford) Progress:0.5
Dangerous Vow (reconquer Whitebridge) Progress:0
Dangerous Vow (have Lestara oversee for the next years) Progress:4
Formidable Journey to find Varena and Purena: Progress 5

Amara of Whitebridge 8 – A sacred tree

[An Ironsworn adventure in the Ironlands. I have played these fights with the Song of Blades and Heroes ruleset by Ganesha Games. Larger battles are played with the Ancient One Hour Wargames rules by Neil Thomas]

Main character: Amara
Edge:+1 Heart:+3 Iron:+2 Shadow:+2 Wits:+1
Health:3 Spirit:4 Supply:1 Momentum:5

Place Whitebrige – a riverside village
NW Haven (near the center of the Ironlands)

ASSETS:
Martial Focus – BRAWLER Secure an Advantage by engaging in close-quarters brawling.
Ritual – AUGUR Summon a murder of crows and ask a single question.
Path – HERBALIST Heal people using herbal remedies.

BONDS:
Deshi (Amara’s father) [oracle: stingy and manipulative forager]
Lestara (Whitebridge overseer) [oracle: generous and powerful healer]
Quinn (Amara’s cousin) strong and dumb warrior
Lago – an attractive and friendly warrior from Redhall

Other NPCs:
Zura – a warrior from Whitebridge who wants to replace Lestara as overseer
Kaivan – the son of the Stoneford healer
Lona – Lago’s sister, another Redhall prominent warrior
Maya – Redhall overseer
Varena and Purena – twin sorceresses

VOWS
Background Vow: – Extreme. When Amara’s father Deshi was overseer, he started a feud with the nearby Stoneford community (another village on the same river, twenty miles NE of Whitebridge). Amara intends to mend the conflict started by her father. Progress: 0.5
Vow: – Dangerous. Let Lestara be overseer for the next seven years. Progress:4

Previous events: Amara, Quinn and the crossbowman Delos attack a group of Broken that are raiding the Whitebridge area. Amara is defeated. The overseer Lestara harshly critiques Amara’s initiative, which ended in favouring Lestara’s rival Zura. The heroes leave Whitebridge and reach Stoneford, where they meet the healer’s son Kaivan. The Stoneford river-idol is stolen by the Makari, a mysterious invading army, as a diversion to help in the occupation of Stoneford. Kaivan leaves the party, angry for having been deceived. The others join a successful counter attack against the Makari: the leader is the friendly Lago of Redhall – it’s love at first sight with Amara. The heroes free Lestara, who had been imprisoned by the Makari. Lago and Quinn fall in the fight. Amara forges a bond with the Redhall overseer Maya, mother of Lago and Lona. Amara accepts to travel south in search of the twin sorceresses Varena and Purena: they are authorities among the Broken and their help is necessary to re-conquer Whitebridge.

Amara, Delos and their Redhall allies Temir and Flint are hunting, when they spot a hump surmounted by a sacred tree, encircled by the traditional ring of iron stones: when they approach the hump, they meet a party of Makari reinforced by a troll. There are rumours that the Makari have cut down several sacred trees and the party moves forward to occupy the hump and defend it.
ANIM

The enemies are faster, with the troll being the first to climb the hump. Amara finds herself at a disadvantage, having to attack from lower ground.

2b.jpgOUT

She strikes a great blow with her sword and the troll falls! The Makari swordsmen are getting closer.

4d.jpgOUT

Delos has moved to his left, and shoots down one of the Makari upon the hump. Temis tries charging the Makari archer, but an arrow forces him to hit the ground. Flint joins Amara and kills one of the enemies, while Amara finishes the fallen troll [who missed a number of activations in a row and was unable to stand up]. Having lost half of their forces, the surviving Makari retreat!

5e.jpgOUT

Amara gets +2 Momentum for this victory (Momentum=7).

Inspired by the sacred place, Amara Swears an Iron Vow to re-conquer Whitebridge, freeing or revenging Lago and Quinn.
Is this vow Dangerous of Formidable? [50/50]: DANGEROUS

Challenge:4,4 Action:5+3(Heart)=8 STRONG HIT and MATCHES
+2 Momentum (now: 9)

[Let’s interpret the Matches, something unexpected but favourable]
Oracle Action/Theme: SCHEME PATH
Amara suddenly feels that she now knows exactly the path leading to the twin sorceresses: I will mark 2 progress on the journey (now progress=3). The two sisters really are the key to re-conquer Whitebridge.

But the party still need to resupply
Challenge:4,1 Action:5+1(Wits)=6 STRONG HIT
A deer approaches the party as they leave the sacred tree, as if offering itself. +2 Supply, now at 3.

Current situation:
Health:3 Spirit:4 Supply:3 Momentum:9
Extreme Background Vow: (alliance with Stoneford) Progress:0.5
Dangerous Vow (reconquer Whitebridge) Progress:0
Dangerous Vow (have Lestara oversee for the next years) Progress:4
Formidable Journey to find Varena and Purena: Progress 3

Sellswords & Spellslingers – Tower of the Necromancer

Sellswords and Spellslingers is a solo / cooperative fantasy skirmish rule-set written by Andrea Sfiligoi and published by Ganesha Games.

In some respects, the game is more similar to RPG combat than to other skirmish games. You only roll dice (d20) for the PCs. Each monster has a Danger Level which the characters have to exceed to inflict damage, else they are wounded instead (10 is the average level). Damage is not rolled: it depends on the weapons used by the PC or on the specific monster (1 and 2 are typical values). Monsters attacking with ranged weapons work similarly: characters try dodging by rolling the monster’s Danger Level or more on a d20. Both monsters and characters have a number of Hit Points (a basic PC has 3 HPs).

The game is played in rounds in which all the PCs try to activate. Activation works by rolling 1 to 3 d20 dice: for each roll lower than 8, an event card is played (which usually means one or more monsters activate); for each roll of 8 or more, the PC can perform an action. I like this simple mechanism (derived from Sfiligoi’s classic Song of Blades and Heroes) for several reasons:

  • it requires you to make an interesting choice for each PC: are you going to roll 1, 2 or 3 dice?
  • each character is under the spotlight in turn: even if a PC fails all his activations, he will likely have to face attacks, something interesting happens to him in all cases;
  • each card is interpreted in relation with the current PC, for instance, if a monster activates it is the one closest to the current PC; this makes it possible to have simple and generic “events” described on the cards, which are easy to interpret in the context of the current PC.

Another feature I found innovative (but I guess something similar appears in other games, possibly Osprey Lion / Dragon Rampant) is the concept of enemy “minions” and “hordes”: all scenarios involve lesser monsters with a single HP. They move and attack in groups, which can form and split as indicated by Event Cards. Damage to a Horde is tracked by simply removing a figure. Hordes with more “minions” have their Danger Level increased. Having several lesser enemies around has the narrative advantage of making the PCs look more heroic and the mechanical advantage of reducing the need to keep track of monster’s HPs.

Here is my AAR of my first game. I chose to play an “expert” scenario, so I used characters totalling 116 XP instead of the “basic” 60 XP.

The heroes:

Archibald the archer (28 XP) – Bow: dmg 1
Archery:+3, VeryFast(moves 6″ instead of 4″)

Dougal with the double-handed sword (49 XP) – dmg 2
Strength:+3, Fight(with DH sword)+3, Hero(activates on a roll of 7)+1, ExtraHP:+1(4 HP total)

Shelley with shield and sword (39 XP) – dmg 1
Fight(with sword)+3, Shield:+3, ExtraHP:+1(4 HP total)

The scenario is about the assaulting the tower of a Necromancer. The tower should have been guarded by skeletons, but I used my Ironsworn paper miniatures of blue soldiers with conical hats instead. I played the guards as DL:7,HP:1, Dmg:1
As required by the scenario, I randomly deployed a horde of 3 guards (behind the trees on the left) and three single guards (given the available figures, I decided to treat these as archers).

1a
Our heroes enter from the right: Archibald, Dougal and Shelley

Round 1
Archibald Failed:1 Success:1
Event card: “It could be worse” starts raining, all ranged attacks at -2 (bad news for Archie, but also the guards will be impaired)

Dougal Failed:2 Success:1
Ambush: a new guard attacks Archie, who kills him
An archer guard shoots at Archibald and wounds him

Shelley Success:2 – moves forward

1b
A first guard is out of combat

Round 2
Archibald Success:1
Dougal Success:3
Shelley Success:2
The heroes use these lucky rolls to move undisturbed towards the tower

Round 3
Archibald Success:2 – shoots and kills the minion at the background, behind the tower

Dougal Failed:2
Event cards. “Big one” – the minion at the centre foreground has 2HP instead of 1
“Reinforcements” – two new guards arrive from the left/foreground

Shelley Failed:2
“Wandering monsters” – a green ghoul enters from the right/foreground
“Horde activates” – the three guards on the left move towards the heroes

3a
New enemies arrive

Round 4
Archibald Success:2 – he wounds with an arrow the “big” guard near the Ghoul

Dougal Failed:1 Success:2 – Doug reaches the door of the tower and opens it (a DL 12 roll). Two new guards spring out of the door and the Necromancer himself appears at the top of the tower! Her first magical energy blast wound Dougal.

Shelley Success:2 – Shelley charges and kills one of the two door guardians

4a
The door is open: more guards to fight!

Round 5
Archibald Success:2 Two lucky strikes for Archie. He kills the “big” guard near the Ghoul he had previously wounded and one of the minions in the horde.

Dougal Failed:1 Success:2 The second and last door guardian is killed.

Shelley Failed:1 Success:2
Event Card: “Monster frenzy” – all enemies activate! The only to receive damage is Archie, hit by an arrow. He has a single HP left.
Shelley moves left toward the horde.

Round 6
Archibald Failed:1 Success:2
Event Card: “I stepped on a scorpion”. Terrible luck for Archibald! He looses his last HP and is out of combat.

Dougal Failed:2
Events: Ambush and Monster Activates. Shelley is ambushed by yet a new guard, but he readily gets read of the nuisance.

Shelley Success:2 – He charges the horde and kills one of minions: only one is left.

6a
Archibald steps on a scorpion

Round 7

Dougal Failed:1 Success:2
Event: the Necromancer “is loaded” – she has even more treasure than expected. Dougal opens the trapdoor to the top of the tower.

Shelley Success:1 – moves towards Archibald

Round 8

Dougal Failed:1 Success:2
Event: a dart trap! Dougal takes 1 HP of damage (he has 3 more left). The hero charges the Necromancer and inflicts 2 HP of damage.

Shelley reaches Archibald and finds out he is comatose: he will survive, if taken out of the battlefield.

8a
The final duel at the top of the tower

Round 9
Dougal Success:2
The Hero attacks the Necromancer and puts her out of combat.

xa
The necromancer is defeated, but will the heroes manage to leave the battlefield?

It would have been interesting to go on playing: I am sure that leaving the battlefield wouldn’t have been too easy for Dougal and Shelley, but, being my first go at the rules, the scenario took about 90 minutes and my available time was over.

I enjoyed both the rules and the scenario. I am looking forward to use this system, possibly replacing SoBH in my current Ironsworn campaign. After this first game, I see two main challenges in designing my own encounters:

  • since the system is asymmetric, with PCs and “monsters” having different stats, understanding what makes a balanced encounter is not trivial;
  • the cards are effective in guiding the enemies when they fight, but if I want the opposition to have other objectives than eliminating the heroes, I will have to interpret the instructions differently; possibly, a more accurate study of the numerous scenarios that come with the rules will provide some inspiration.

Ironsworn: Amara of Whitebridge 6 – Rescuing Lestara

[An Ironsworn adventure in the Ironlands. I have played these fights with the Song of Blades and Heroes ruleset by Ganesha Games. Larger battles are played with the Ancient One Hour Wargames rules by Neil Thomas]

Main character: Amara
Edge:+1 Heart:+3 Iron:+2 Shadow:+2 Wits:+1
Health:3 Spirit:5 Supply:1 Momentum:7

Place Whitebrige – a riverside village
NW Haven (near the center of the Ironlands)

ASSETS:
Martial Focus – BRAWLER Secure an Advantage by engaging in close-quarters brawling.
Ritual – AUGUR Summon a murder of crows and ask a single question.
Path – HERBALIST Heal people using herbal remedies.

BONDS:
Deshi (Amara’s father) [oracle: stingy and manipulative forager]
Lestara (Whitebridge overseer) [oracle: generous and powerful healer]
Quinn (Amara’s cousin) strong and dumb warrior
Lago – an attractive and friendly warrior from Redhall

Other NPCs:
Zura – a warrior from Whitebridge who wants to replace Lestara as overseer
Kaivan – the son of the Stoneford healer
Lona – Lago’s sister, another Redhall prominent warrior

VOWS
Background Vow: – Extreme. When Amara’s father Deshi was overseer, he started a feud with the nearby Stoneford community (another village on the same river, twenty miles NE of Whitebridge). Amara intends to mend the conflict started by her father. Progress: 0.5
Vow: – Dangerous. Let Lestara be overseer for the next seven years. Progress:0

Previous events: Amara, Quinn and the crossbowman Delos attack a group of broken that are raiding the area. The heroes are defeated. Lestara harshly critiques Amara’s initiative, which ended in favouring Zura. Amara, Quinn and Delos leave Whitebridge heading for Stoneford. The day after their arrival, the Stoneford river-idol is stolen and the heroes join Kaivan, a young man from Stoneford, in the hunt for the thieves. They defeat a group of mysterious strangers who call themselves “Makari”: the heroes find out that the theft was but a diversion. Stoneford has been conquered by the Makari and Kaivan leaves the party. Amara and the others join a successful counter attack North of Stoneford: the leader is the friendly Lago of Redhall – it’s love at first sight with Amara. Amara, Quinn, Delos and Lago travel towards Whitebridge where the Makari, with the help of Zura, have imprisoned Lestara.

At night, Amara, Lago, Quinn and Delos reach the outskirts of Whitebridge. From behind the trees, they spot the night patrol: four Makari.

a1.jpgOUT
On the right: Delos, Quinn, Amara and Lago

They ambush them springing forward in the dark. Amara and Lago go first: one of the Makari is put out of the fight, two more are pressed by the heroes. Quinn and Delos join the fight to eliminate the last resistance.
a3.jpgOUT

They move to the centre of the village, searching buildings one by one, looking for Lestara.
The first two buildings are empty: Lestara is in the building at the bottom of the square, guarded by four more Makari!
b2.jpgOUT
Amara scores a gruesome kill (a Song of Blades and Heroes feature) with her first attack and the other Makari fail their morale roll and run away, screaming the alarm. Lestara is free! She grabs a knife from the dead Makari guard.

b3.jpgOUT
Lestara exits her prison!

So far, so good. But one of the running guards finds the courage to come back to the fight and he is joined by two more Makari: a second spear-man and one armed with a crossbow.
c1.jpgOUT
The two Makari spear-men prove to be tough fighters: Quinn is taken down, then it’s Lago’s turn. Amara forces her opponent to recoil and faces a hard choice: she decides to leave Quinn and her beloved Lago behind, taking Lestara to safety.

c2.jpgOUT
Lago and Quinn are out of combat

Having lost Lago and Quinn, I feel Amara must suffer -3 spirit.
Test your spirit: Challenge:9,1 Action:3+3(Heart)=6 Weak hit – press on

I mark 2 progress on Amara’s goal to have Lestara rule on the Whitebridge community.

Do they head towards Redhall? [Likely] YES
I decide to throw a “twist” in: something Lestara might have discovered during her imprisonment.
[ORACLE 16: TWISTS: 72 “a new danger appears”]
Lestara has overheard that the Makari have a pact with the Trolls, she has also seen a huge brute in Whitebridge. Hordes of Trolls will soon join the Makari in their attack to Havens.

Health:3 Spirit:2 Supply:1 Momentum:7